


My Cart
You have no items in your shopping cart.
en
 Abutilon
 Acalypha
 Aechmea
 Aeschynanthus
 Aglaonema
 Alocasia
 Aloe
Aloe
 Anthurium
 Araucaria
 Ardisia
 Aspidistra
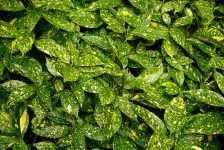 Aucuba
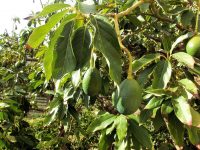 Avocado
 Azaleas
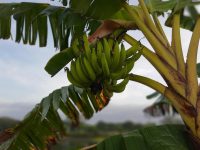 Banana tree
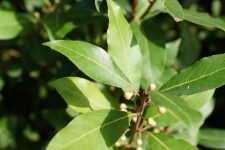 Bay laurel
 Beaucarnea
 Begonia
 Billbergia
 Bonsai
 Bougainvillea
 Cactus
 Calathea
 Calla lily
 Callistemon
 Camellia
 Capsicum
 Chamaedorea
 Chlorophytum
 Citrus
 Clivia
 Codiaeum
 Coffee tree
 Cyclamen
 Dieffenbachia
 Dionaea muscipula
 Dipladenia
 Dracaena
 Euphorbia
 Ferns
Ferns
 Ficus
Ficus
 Fittonia
 Fuchsia
 Gardenia
 Gerbera
 Gloxinia
 Guzmania
 Gynura
 Hippeastrum
 Indoor ornamental plants
 Ivy
Ivy
 Jasmine
 Kalanchoe
 Lobster-claws
 Lucky bamboo
 Madagascar jasmine
 Mango
Mango
 Maranta
 Mimosa
 Monstera
 Murraya
 Oleander
 Olive tree
 Orchids
 Oxalis
 Pachira
 Palm trees
 Passiflora
 Pelargonium
 Peperomia
 Philodendron
 Pilea
Pilea
 Pineapple
 Plumeria
 Pothos
 Primula
 Rhipsalis
 Saintpaulia
 Sansevieria
 Schefflera
 Senecio
 Shoeblackplant
 Solanum
 Spathiphyllum
 Strelitzia
 String-of-pearls
 Succulents
 Tillandsia
 Tradescantia
 Vriesea
 Yucca
Yucca
 Zamioculcas
 Zebra-plant
 Abelia
 Albizia
 American sweetgum
 Annual honesty
 Arborvitae
 Asian bleeding-heart
 Astilbe
 Autumn crocus
 Balloon flower
 Bamboo
 Barberry
 Birch
Birch
 Black locust
 Black-eyed Susan
 Boxwood
 Brugmansia
 Calluna
 Campsis radicans
 Carnations
 Catalpa
 Cherry laurel
 Chocolate vine
 Chrysanthemum
 Clematis
 Common hawthorn
 Common privet
 Common zinnia
 Conifers
 Cotinus
 Cotoneaster
 Crepe-myrtle
 Cypress
 Daffodils
 Dahlia
 Damask rose
 Dense blazing star
 Deutzia
 Diascia
 Dog-rose
 Dogwood
 Egyptian starcluster
 Elderflower Ornamental
 Elm
Elm
 English dogwood
 Euonymus
 Evergreen candytuft
 Everlasting flowers
 Fairy fan-flower
 Fir tree
 Florentine Iris
 Forsythia
 Freesia
 Gazania
 Ginkgo Biloba
 Gladioli
 Great masterwort
 Heartleaf Bergenia
 Hebe
Hebe
 Hellebore
 Hibiscus
 Hollyhock
 Honey locust
 Hornbeam
 Hosta
Hosta
 How it works
 Hyacinth
 Hydrangea
 Ilex
Ilex
 Impatiens
 Japanese cherry
 Japanese quince
 Japanese skimmia
 Jasmine tobacco
 Juniper
 Lacy phacelia
 Lamb's-ear
 Lantana camara
 Lavender
 Lilac
Lilac
 Lilies
 Lily of the valley
 Linden
 Lisianthus
 London plane tree
 Lonicera
 Magnolia
 Mahonia
 Maple
Maple
 Marigold
 Marvel-of-Peru
 Mountain-laurel
 Myosotis
 Norway spruce
 Oak
Oak
 Ornamental Chestnut
 Ornamental hazel
 Ornamental onion
 Osage orange
 Outdoor Ornamental Plants
 Pampas grass
 Pansies
 Paulownia
 Peony
Peony
 Petunias
 Phlox
Phlox
 Photinia
 Pine
Pine
 Plectranthus
 Pomegranate
 Rhododendron
 Rock garden
 Roses
Roses
 Rowan
Rowan
 Scarlet Firethorn
 Shrubby cinquefoil
 Siskiyou lewisia
 Snapdragon
 Snowdrops
 Spiraea
 Sumac
Sumac
 Sweet alyssum
 Symphoricarpos
 Tamarisk
 Tree of heaven
 Tree of Judah
 Tulip
Tulip
 Tulip tree
 Viburnum
 Weigela
 Willow
 Wisteria
 Zephyranthes
 Ants
Ants
 Armadillos
 Bats
Bats
 Beavers
 Bed bugs
 Birds
Birds
 Clothes moths
 Earwigs
 Fleas
Fleas
 Flies
Flies
 Food moths
 Foxes
Foxes
 Fruit fly
 General Pest Control
 German Cockroaches
 Grain weevils
 How it works - Pest Control
 Lice
Lice
 Mice
Mice
 Mold
Mold
 Moles
Moles
 Mosquitoes
 Myriapods
 Oriental Cockroaches
 Poultry mites
 Rabbits
 Raccoons
 Rats
Rats
 Silverfish
 Skunks
 Snakes
 Spiders
 Squirrels
 Stink bug
 Stray cats
 Stray dogs
 Ticks
Ticks
 Tobacco beetles
 Wasps
Wasps
 Wild boars
 Wood borers
 Asparagus
 Beans
Beans
 Broad bean
 Broccoli
 Brussels sprout
 Cabbage
 Carrot
 Cauliflower
 Celery
 Chickpea
 Cucumber
 Eggplants
 Fennel
 Garlic
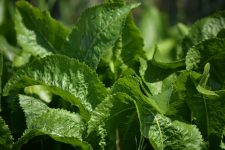 Horseradish
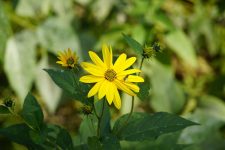 Jerusalem artichoke
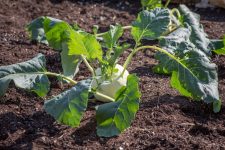 Kohlrabi
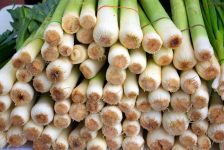 Leek
Leek
 Lentil
 Lettuce
 Lupine
 Melons
 Mushrooms
 Nettle
 Okra
Okra
 Onion
Onion
 Parsley
 Parsnip
 Patience dock
 Peanuts
 Peas
Peas
 Pepper
 Potato
 Pumpkin
 Radishes
 Rhubarb
 Sorrel
 Spinach
 Sponge gourd
 Sweet potato
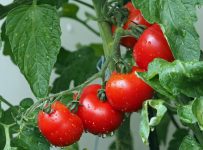 Tomatoes
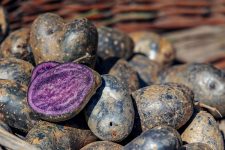 Vitelotte
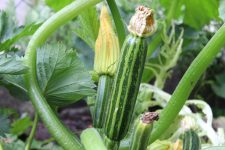 Zucchini
Abutilon
Acalypha
Aechmea
Aeschynanthus
Aglaonema
Alocasia
Aloe
Anthurium
Araucaria
Ardisia
Aspidistra
Aucuba
Avocado
Azaleas
Banana tree
Bay laurel
Beaucarnea
Begonia
Billbergia
Bonsai
Bougainvillea
Cactus
Calathea
Calla lily
Callistemon
Camellia
Capsicum
Chamaedorea
Chlorophytum
Citrus
Clivia
Codiaeum
Coffee tree
Cyclamen
Dieffenbachia
Dionaea muscipula
Dipladenia
Dracaena
Euphorbia
Ferns
Ficus
Fittonia
Fuchsia
Gardenia
Gerbera
Gloxinia
Guzmania
Gynura
Hippeastrum
Indoor ornamental plants
Ivy
Jasmine
Kalanchoe
Lobster-claws
Lucky bamboo
Madagascar jasmine
Mango
Maranta
Mimosa
Monstera
Murraya
Oleander
Olive tree
Orchids
Oxalis
Pachira
Palm trees
Passiflora
Pelargonium
Peperomia
Philodendron
Pilea
Pineapple
Plumeria
Pothos
Primula
Rhipsalis
Saintpaulia
Sansevieria
Schefflera
Senecio
Shoeblackplant
Solanum
Spathiphyllum
Strelitzia
String-of-pearls
Succulents
Tillandsia
Tradescantia
Vriesea
Yucca
Zamioculcas
Zebra-plant
Abelia
Albizia
American sweetgum
Annual honesty
Arborvitae
Asian bleeding-heart
Astilbe
Autumn crocus
Balloon flower
Bamboo
Barberry
Birch
Black locust
Black-eyed Susan
Boxwood
Brugmansia
Calluna
Campsis radicans
Carnations
Catalpa
Cherry laurel
Chocolate vine
Chrysanthemum
Clematis
Common hawthorn
Common privet
Common zinnia
Conifers
Cotinus
Cotoneaster
Crepe-myrtle
Cypress
Daffodils
Dahlia
Damask rose
Dense blazing star
Deutzia
Diascia
Dog-rose
Dogwood
Egyptian starcluster
Elderflower Ornamental
Elm
English dogwood
Euonymus
Evergreen candytuft
Everlasting flowers
Fairy fan-flower
Fir tree
Florentine Iris
Forsythia
Freesia
Gazania
Ginkgo Biloba
Gladioli
Great masterwort
Heartleaf Bergenia
Hebe
Hellebore
Hibiscus
Hollyhock
Honey locust
Hornbeam
Hosta
How it works
Hyacinth
Hydrangea
Ilex
Impatiens
Japanese cherry
Japanese quince
Japanese skimmia
Jasmine tobacco
Juniper
Lacy phacelia
Lamb's-ear
Lantana camara
Lavender
Lilac
Lilies
Lily of the valley
Linden
Lisianthus
London plane tree
Lonicera
Magnolia
Mahonia
Maple
Marigold
Marvel-of-Peru
Mountain-laurel
Myosotis
Norway spruce
Oak
Ornamental Chestnut
Ornamental hazel
Ornamental onion
Osage orange
Outdoor Ornamental Plants
Pampas grass
Pansies
Paulownia
Peony
Petunias
Phlox
Photinia
Pine
Plectranthus
Pomegranate
Rhododendron
Rock garden
Roses
Rowan
Scarlet Firethorn
Shrubby cinquefoil
Siskiyou lewisia
Snapdragon
Snowdrops
Spiraea
Sumac
Sweet alyssum
Symphoricarpos
Tamarisk
Tree of heaven
Tree of Judah
Tulip
Tulip tree
Viburnum
Weigela
Willow
Wisteria
Zephyranthes
Ants
Armadillos
Bats
Beavers
Bed bugs
Birds
Clothes moths
Earwigs
Fleas
Flies
Food moths
Foxes
Fruit fly
General Pest Control
German Cockroaches
Grain weevils
How it works - Pest Control
Lice
Mice
Mold
Moles
Mosquitoes
Myriapods
Oriental Cockroaches
Poultry mites
Rabbits
Raccoons
Rats
Silverfish
Skunks
Snakes
Spiders
Squirrels
Stink bug
Stray cats
Stray dogs
Ticks
Tobacco beetles
Wasps
Wild boars
Wood borers
Asparagus
Beans
Broad bean
Broccoli
Brussels sprout
Cabbage
Carrot
Cauliflower
Celery
Chickpea
Cucumber
Eggplants
Fennel
Garlic
Horseradish
Jerusalem artichoke
Kohlrabi
Leek
Lentil
Lettuce
Lupine
Melons
Mushrooms
Nettle
Okra
Onion
Parsley
Parsnip
Patience dock
Peanuts
Peas
Pepper
Potato
Pumpkin
Radishes
Rhubarb
Sorrel
Spinach
Sponge gourd
Sweet potato
Tomatoes
Vitelotte
Zucchini
Zucchini
Abutilon
Acalypha
Aechmea
Aeschynanthus
Aglaonema
Alocasia
Aloe
Anthurium
Araucaria
Ardisia
Aspidistra
Aucuba
Avocado
Azaleas
Banana tree
Bay laurel
Beaucarnea
Begonia
Billbergia
Bonsai
Bougainvillea
Cactus
Calathea
Calla lily
Callistemon
Camellia
Capsicum
Chamaedorea
Chlorophytum
Citrus
Clivia
Codiaeum
Coffee tree
Cyclamen
Dieffenbachia
Dionaea muscipula
Dipladenia
Dracaena
Euphorbia
Ferns
Ficus
Fittonia
Fuchsia
Gardenia
Gerbera
Gloxinia
Guzmania
Gynura
Hippeastrum
Indoor ornamental plants
Ivy
Jasmine
Kalanchoe
Lobster-claws
Lucky bamboo
Madagascar jasmine
Mango
Maranta
Mimosa
Monstera
Murraya
Oleander
Olive tree
Orchids
Oxalis
Pachira
Palm trees
Passiflora
Pelargonium
Peperomia
Philodendron
Pilea
Pineapple
Plumeria
Pothos
Primula
Rhipsalis
Saintpaulia
Sansevieria
Schefflera
Senecio
Shoeblackplant
Solanum
Spathiphyllum
Strelitzia
String-of-pearls
Succulents
Tillandsia
Tradescantia
Vriesea
Yucca
Zamioculcas
Zebra-plant
Abelia
Albizia
American sweetgum
Annual honesty
Arborvitae
Asian bleeding-heart
Astilbe
Autumn crocus
Balloon flower
Bamboo
Barberry
Birch
Black locust
Black-eyed Susan
Boxwood
Brugmansia
Calluna
Campsis radicans
Carnations
Catalpa
Cherry laurel
Chocolate vine
Chrysanthemum
Clematis
Common hawthorn
Common privet
Common zinnia
Conifers
Cotinus
Cotoneaster
Crepe-myrtle
Cypress
Daffodils
Dahlia
Damask rose
Dense blazing star
Deutzia
Diascia
Dog-rose
Dogwood
Egyptian starcluster
Elderflower Ornamental
Elm
English dogwood
Euonymus
Evergreen candytuft
Everlasting flowers
Fairy fan-flower
Fir tree
Florentine Iris
Forsythia
Freesia
Gazania
Ginkgo Biloba
Gladioli
Great masterwort
Heartleaf Bergenia
Hebe
Hellebore
Hibiscus
Hollyhock
Honey locust
Hornbeam
Hosta
How it works
Hyacinth
Hydrangea
Ilex
Impatiens
Japanese cherry
Japanese quince
Japanese skimmia
Jasmine tobacco
Juniper
Lacy phacelia
Lamb's-ear
Lantana camara
Lavender
Lilac
Lilies
Lily of the valley
Linden
Lisianthus
London plane tree
Lonicera
Magnolia
Mahonia
Maple
Marigold
Marvel-of-Peru
Mountain-laurel
Myosotis
Norway spruce
Oak
Ornamental Chestnut
Ornamental hazel
Ornamental onion
Osage orange
Outdoor Ornamental Plants
Pampas grass
Pansies
Paulownia
Peony
Petunias
Phlox
Photinia
Pine
Plectranthus
Pomegranate
Rhododendron
Rock garden
Roses
Rowan
Scarlet Firethorn
Shrubby cinquefoil
Siskiyou lewisia
Snapdragon
Snowdrops
Spiraea
Sumac
Sweet alyssum
Symphoricarpos
Tamarisk
Tree of heaven
Tree of Judah
Tulip
Tulip tree
Viburnum
Weigela
Willow
Wisteria
Zephyranthes
Ants
Armadillos
Bats
Beavers
Bed bugs
Birds
Clothes moths
Earwigs
Fleas
Flies
Food moths
Foxes
Fruit fly
General Pest Control
German Cockroaches
Grain weevils
How it works - Pest Control
Lice
Mice
Mold
Moles
Mosquitoes
Myriapods
Oriental Cockroaches
Poultry mites
Rabbits
Raccoons
Rats
Silverfish
Skunks
Snakes
Spiders
Squirrels
Stink bug
Stray cats
Stray dogs
Ticks
Tobacco beetles
Wasps
Wild boars
Wood borers
Asparagus
Beans
Broad bean
Broccoli
Brussels sprout
Cabbage
Carrot
Cauliflower
Celery
Chickpea
Cucumber
Eggplants
Fennel
Garlic
Horseradish
Jerusalem artichoke
Kohlrabi
Leek
Lentil
Lettuce
Lupine
Melons
Mushrooms
Nettle
Okra
Onion
Parsley
Parsnip
Patience dock
Peanuts
Peas
Pepper
Potato
Pumpkin
Radishes
Rhubarb
Sorrel
Spinach
Sponge gourd
Sweet potato
Tomatoes
Vitelotte
Zucchini
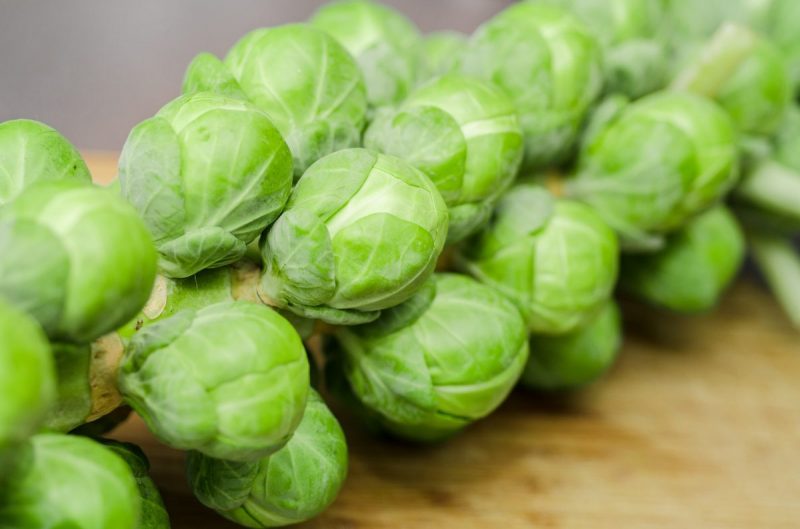
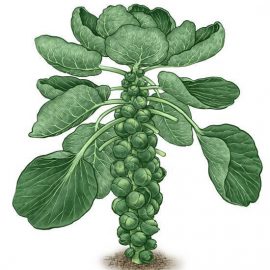
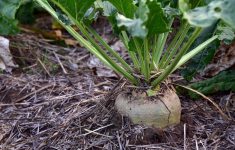
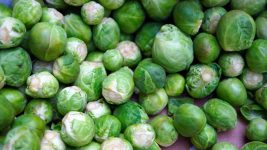
Brussels sprouts (Brassica oleracea var. gemmifera) are grown for the sprouts that form at the base of the leaves and are consumed in various forms during the autumn-winter period. The plants are resistant to low temperatures and in areas with mild winters, the plants can remain in the field until spring. The Brussels sprouts have a pleasant taste and contain significant amounts of vitamins and minerals. It also has therapeutic properties.
The plant is native to the Mediterranean Sea and the Atlantic Ocean and was introduced into the culture in the 18th century. It quickly became very popular and cultivation spread to Great Britain, Belgium, Holland, and France. The highest consumption of Brussels sprouts is in the UK, the Netherlands, and Belgium.
It is a biennial plant with a well-developed root system. The stem is tall, 0.8-1.2 m, with petiolate, cordate leaves. On the stem, 40-70 buds will form, from which the greenish sprouts will develop. At consumption maturity, the sprouts will be 3-4 cm in diameter and as they develop, the leaves begin to fall off. In the second year of growth, flowering stems with yellow flowers will form out of the sprouts. One plant has between 3000 and 5000 flowers.
The optimum growing temperature is between 15 and 21℃ and the spouts develop normally at temperatures of 15-18℃, higher temperatures negatively influence their development. This species has high light requirements only in the seedling phase. Water requirements are high, with constant soil moisture needed for good growth and development. It is not recommended to alternate dry periods with excess water. Brussels sprouts prefer deep, fertile, and well-structured soils.
In autumn, you can fertilize with well-decomposed manure, but Brussels sprouts also react well to chemical fertilizers. After the basic fertilization, the soil needs to be tilled to a depth of 25-30 cm. In spring the soil should be well tilled and optionally you can apply NPK complex fertilizer. A pre-emergent herbicide can be used before planting.
You can find products on a different store
You can find products on a different store
You can find products on a different store
You can find products on a different store
You can find products on a different store
You can find products on a different store
You can find products on a different store
You can find products on a different store
You can find products on a different store
You can find products on a different store
You can find products on a different store
You can find products on a different store
You can find products on a different store
You can find products on a different store
You can find products on a different store
You can find products on a different store
You can find products on a different store
You can find products on a different store
You can find products on a different store
You can find products on a different store
You can find products on a different store
You can find products on a different store
You can find products on a different store
You can find products on a different store
The Brussels sprout crop is established by seedlings, previously produced in seedbeds or seedling beds. It is recommended to use peat as a substrate for sowing and sprouting, as it is free from diseases and pests. Once 2-3 real leaves have formed, you can apply foliar fertilizers. For one hectare of crop, 200-250 grams of seed are needed.
Sowing should be done 4-6 weeks before planting in the field, about 2.5 cm between rows and 2.5 cm between plants per row. When the seedlings have 2 true leaves, they should be pricked out into pots 5 x 5 x 5 cm.
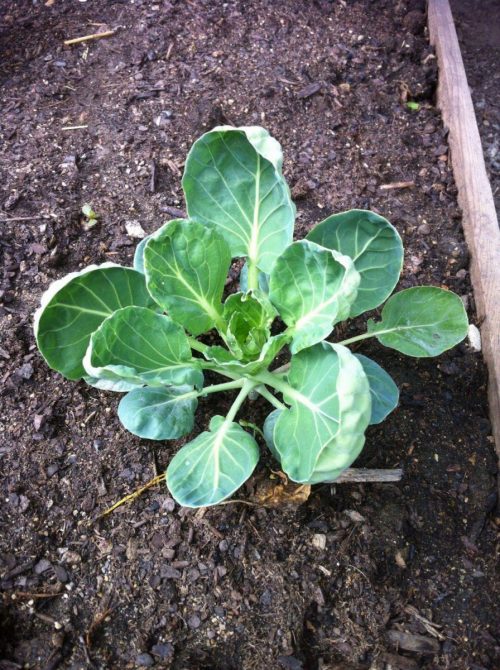
At planting, the seedlings should be 50-60 days old and 10-15 cm tall. The branches shall be planted so that the leaves on the lower part of the plant touch the ground. Planting distances are 70 cm between rows and 40 cm between plants per row.
It is done by applying specific fungicide and insecticide treatments. To avoid the appearance of diseases or pests resistant to pesticides, it is recommended to alternate products.
To encourage gas exchange at the root level, the soil must be regularly loosened by hoeing. Herbicides can also be applied to control weeds.
You can find products on a different store
You can find products on a different store
You can find products on a different store
You can find products on a different store
You can find products on a different store
You can find products on a different store
You can find products on a different store
You can find products on a different store
You can find products on a different store
You can find products on a different store
You can find products on a different store
You can find products on a different store
You can find products on a different store
You can find products on a different store
You can find products on a different store
You can find products on a different store
You can find products on a different store
You can find products on a different store
You can find products on a different store
You can find products on a different store
You can find products on a different store
You can find products on a different store
You can find products on a different store
You can find products on a different store
Four days after planting, fill the gaps in the crop with spare seedlings of the same variety/hybrid.
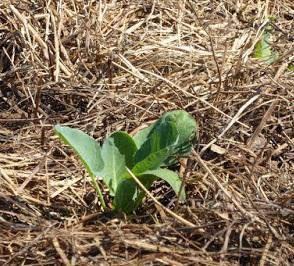
The soil can be mulched before planting with polythene sheeting or after planting if plant material such as straw is used. This will make the soil warmer, weeds will stop growing and the microbiological activity of the soil will be stimulated.
If there is no rainfall, irrigation is necessary throughout the growing season. Watering can be done in furrows, by sprinkling, or preferably by drip.
To obtain high yields, apply fertilizers. Fertilizers should be applied 3-4 weeks after planting, using complex fertilizers.
You can find products on a different store
You can find products on a different store
You can find products on a different store
You can find products on a different store
You can find products on a different store
You can find products on a different store
You can find products on a different store
You can find products on a different store
You can find products on a different store
You can find products on a different store
You can find products on a different store
You can find products on a different store
You can find products on a different store
You can find products on a different store
You can find products on a different store
You can find products on a different store
You can find products on a different store
You can find products on a different store
You can find products on a different store
You can find products on a different store
You can find products on a different store
You can find products on a different store
You can find products on a different store
You can find products on a different store
When the sprouts are 1 cm in diameter, you can break off the top of the plant. This will make the sprouts mature faster and the yield will be of higher quality. If you want the plant to mature faster, break off the first 25 cm of the stem.
Brussels sprouts are harvested after frost when the sprouts are firm, compact, and deep green. The sprouts should be about 3-4 cm in diameter. The operation can be carried out from autumn to spring by cutting the stems, after which the sprouts are removed. They can be stored for up to 5 weeks in controlled-atmosphere warehouses at 0℃ and 95% humidity.
If you haven't yet found solutions in our articles or previous discussions, start a new discussion and our experts will help you.
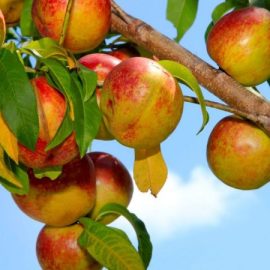
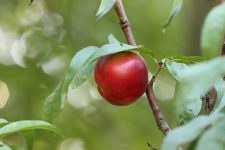
Nectarine (Prunus persica var. nucipersica) are members of the Rosaceae family, cultivated for their sweet and aromatic fruits. They’re a variety of peach... more

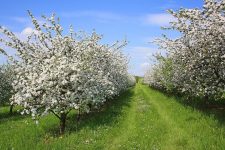
Plant varieties that lend a tropical ambiance can be the best choice for your garden. Tropical gardens are known for their lush greenery... more